In this second installment of My Favourite Things, I’m going to walk you through installing the Yoast SEO plugin and using it for the first time.
What is Yoast SEO?
It’s a super simple, super intuative plugin that helps you optimize your posts and pages for search engines. According to Yoast’s website, the plugin:
…is the most complete WordPress SEO plugin that exists today for WordPress.org users. It incorporates everything from a snippet preview and page analysis functionality that helps you optimize your pages content, images titles, meta descriptions and more to XML sitemaps, and loads of optimization options in between.
I love using this plugin as one part of a good SEO stratgey.
How to Install the Yoast SEO plugin
Log in to WordPress. From your Dashboard, click (Plugins > Add New).

Next, search for the plugin in the WordPress repository. Type “Yoast SEO” in the search bar and click “Search Plugins”:
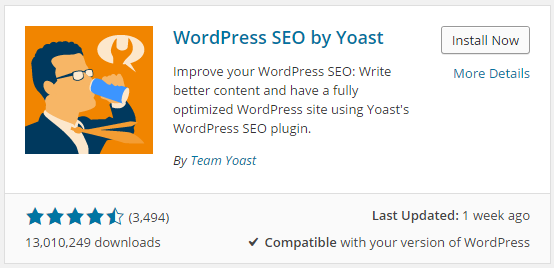
Make sure that you choose the plugin authored by Joost De Valk. Click “Install Now”:
When WordPress asks you if you are sure, click OK:
Now activate the plugin by, you guessed it, clicking “ACTIVATE”:
Woo-hoo! It’s installed & activated. Visit the Yoast Website for detailed instructions on how to customise and configure the plugin using the “Yoast WordPress SEO: General Settings”. You’ll also get a SUPER handy walk-through tour of all the settings immediately following activation. FUN!
Now let’s get our pretty hands dirty and use the plugin for the first time!
How to use the Yoast SEO plugin
When writing a post, an important part of your Search Engine Optimization strategy is keyword research. Do this before you write the post. Once you have written the post, that’s when the Yoast SEO plugin comes in handy.
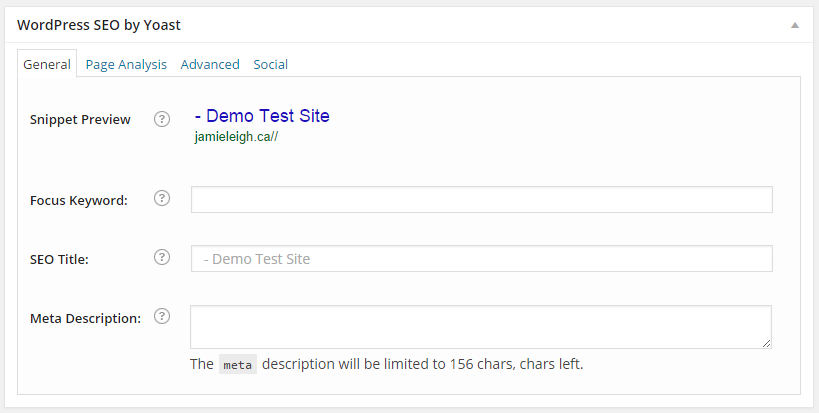
In WordPress, just underneath your post/page editor, you’ll see the “WordPress SEO by Yoast” plugin options:
Pretty stark, eh?
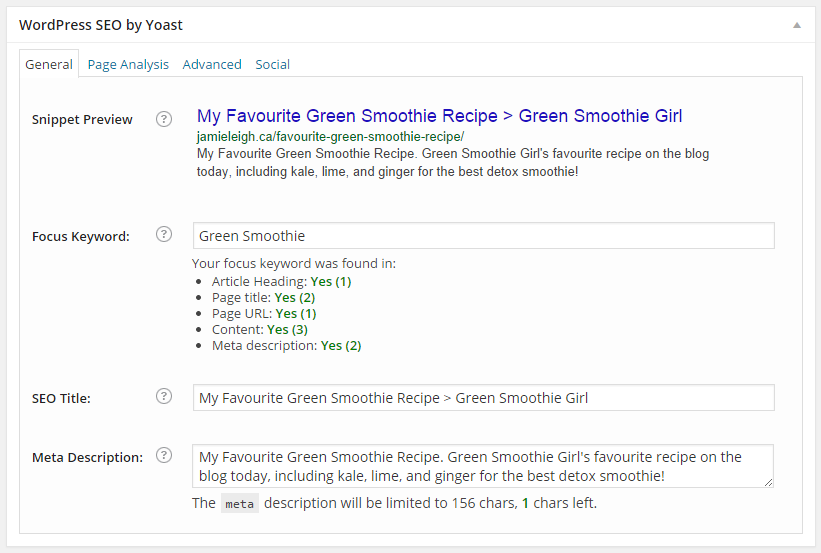
So this is where you want to start fillin’ in the blanks! Start with the keyword(s) that you previously researched. Make it relevant to your post and make it helpful to what folks are searching for information on! For example, if I were writing a post on my fav green smoothie, my focus keyword would definitely be “Green Smoothie” and my SEO title would explain a little more about the post and my website while including my keyword. The meta description? It goes further. You want to use this space to really let folks know what to expect when they click through to read your post. Make sure you include rich keywords here!
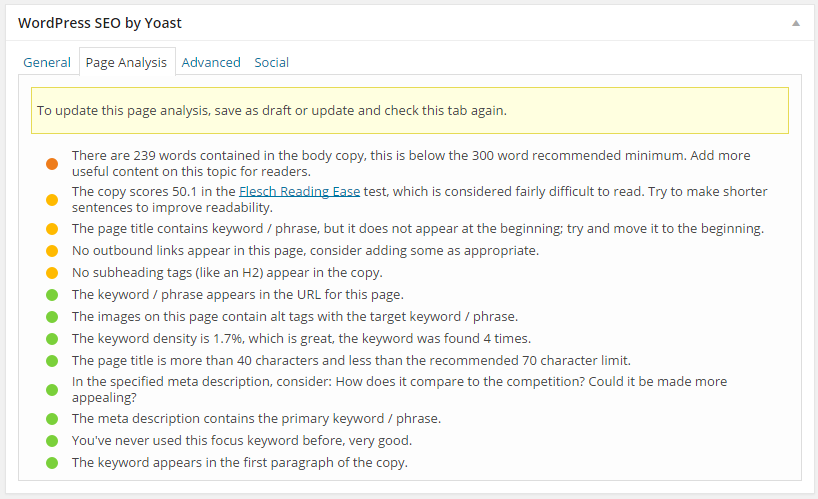
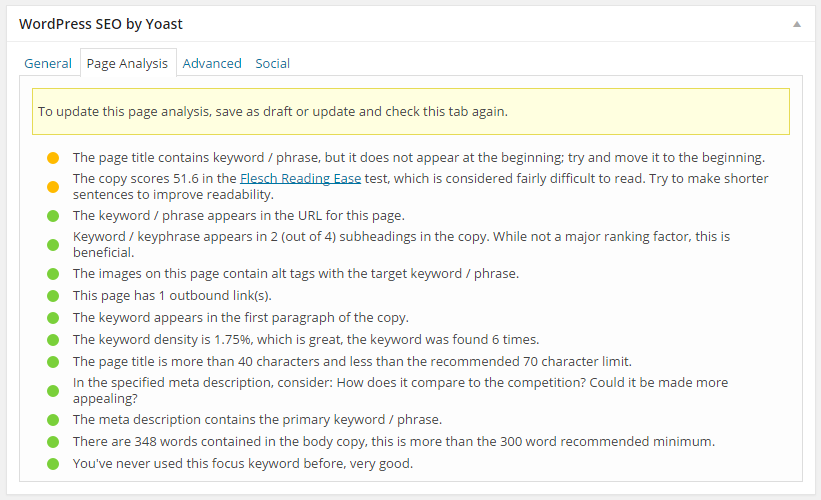
Now here’s the beauty of Yoast’s SEO plugin for WordPress. It helps you by identifying how much you’ve used your keyword. Which is awesome. And if you click the “Page Analysis” tab? It gives you even MORE great pointers on how to optimise the post!!
So with these tips, I added three different Sub Headings to the post (this is also a really, really good strategy for readability), wrote some more copy, added an external link to the Simple Green Smoothies site (AWESOME resource!!), and added my keyword in the alt tag of that link. Now check out the page analysis:
Beware of the green light syndrome, though, and make sure you aren’t “tricking the system” – always use geniune rich key words that you know from your research that YOUR people are using to find information like yours. And always write for your people, not search engines, k?
Read on for more helpful SEO tips:
Other Awesome Resources:
Yoast: 10 tips for an awesome and SEO-friendly blog post
Yoast: The Definitive Guide To Higher Rankings For WordPress Sites
Google: SEO for Startups in under 10 minutes
Now it’s your turn to let me know what you think! Have you used this plugin before? What’s your favourite SEO strategy?


