Part of maintaining a super sexy website is making sure that the user experience is smooth. And part of that experience? Making sure that all of your links take your website viewer where you want them to go. And like most tasks you want to perform in WordPress? There’s a plugin for that!
How to clean up broken website links
From your WordPress Dashboard, click PLUGINS > ADD NEW:
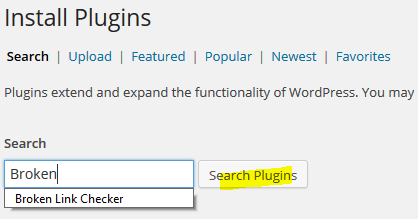
Next, search for the plugin in the WordPress repository. Type “Broken Link Checker” in the search bar and click “Search Plugins”:
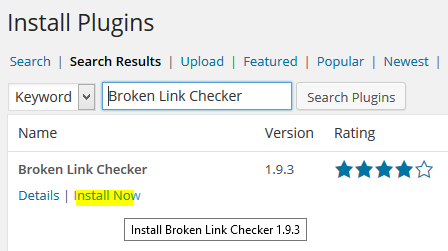
You see that plugin there? Is the developer’s name “Janis Elsts”? Install it. Click “Install Now”:
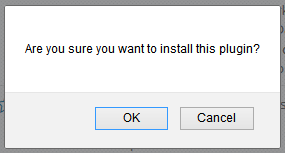
When WordPress asks you if you are sure, click OK:
Now activate the plugin by, you guessed it, clicking “ACTIVATE”:
Woo-hoo! It’s installed & activated. Now let’s get our little hands dirty and clean up all your broken website links. Click SETTINGS > LINK CHECKER:
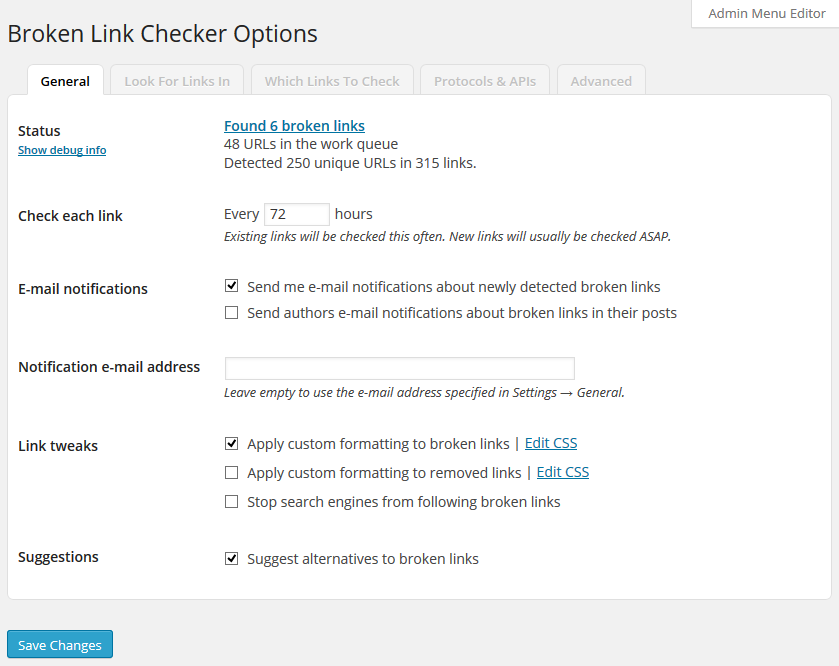
You should see the general options page of the broken link checker. It displays the status of your site, how many unique URLS you have in your content (including images, pages, posts, and custom fields), how often your site is checked for broken links, where email notifications go to, and a few other general options. If you’re lucky, you won’t have any broken links. But chances are you’ll have a few. Don’t worry. Broken website links happen.
The list of customizable options may look very daunting, but don’t worry. This plugin works great out of the box with no extra customization. I do, however, suggest you take a look at a couple options:
Notification Email Address: if you don’t specify an email address, notifications will be sent to the email address in your WordPress general settings. You may want to put your website administrator’s email address here.
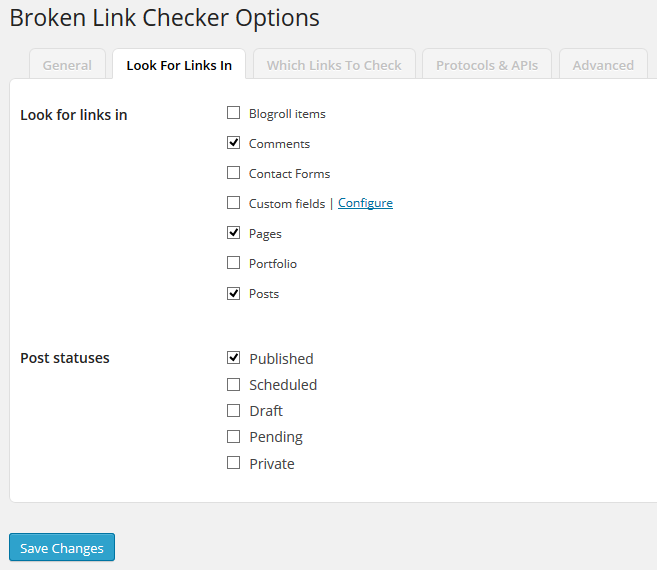
In the “Look For Links In” tab, I suggest you only select “Comments,” “Pages,” “Posts,” and “Published.” That means Broken Link Checker will only search through published comments, pages, and posts for broken links.
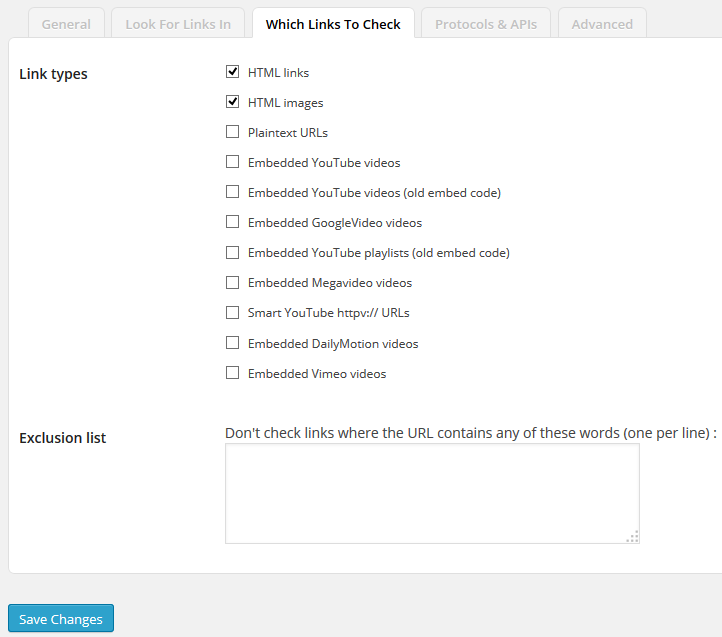
The “Which Links to Check” tab asks you to specify just that: Which links you’d like the plugin to check. To keep it simple, select only HTML links and images. Select only the types of links that your site includes and remember the more links you select, the higher the load will be on your server when the plugin runs.
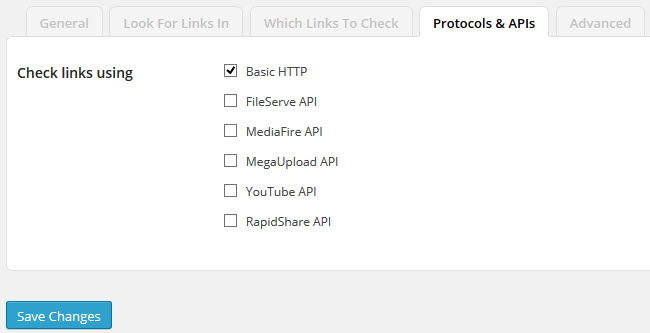
On the “Protocols and APIs” tab you can change what protocol or API the plugin uses to check links. Basic HTTP is good enough.
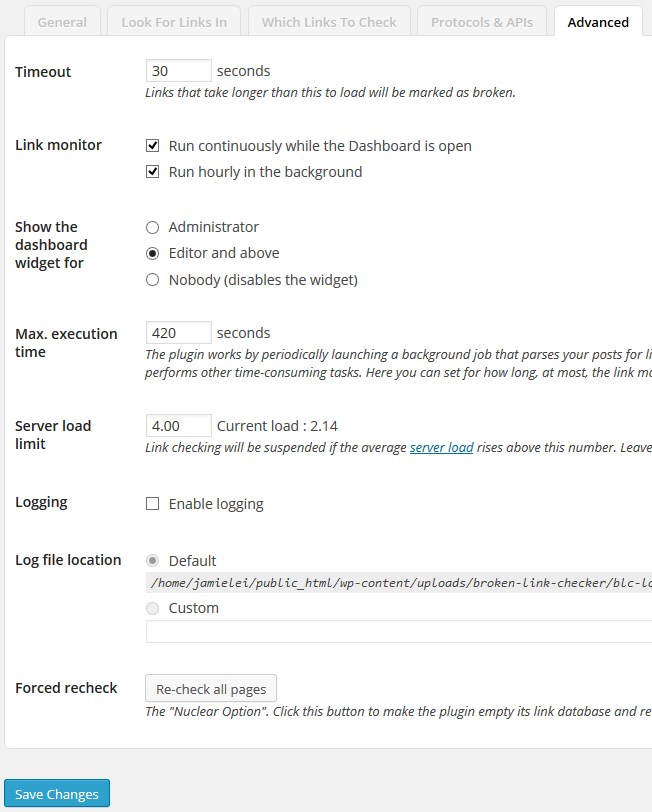
The “Advanced” options tab gives you yet more choices, and all of them are a matter of preference except one: Server Load Limit. This states that if the server load is higher than the number specified, Broken Link Checker will not run. If you change this limit make sure it is to a lower number as it will directly impact the performance of your website.
As always, don’t forget to click “Save Changes” before you navigate away from the plugin options.
Here comes the fun part: actually fixing the darn links after the plugin has found them! This is (in my opinion) the coolest part of the plugin. Lots of services can tell you that you’ve got crawl errors (broken links) but how many of them will edit them for you?!?!?
In the top right hand corner of your screen next to the screen options, click “Go to Broken Links”:
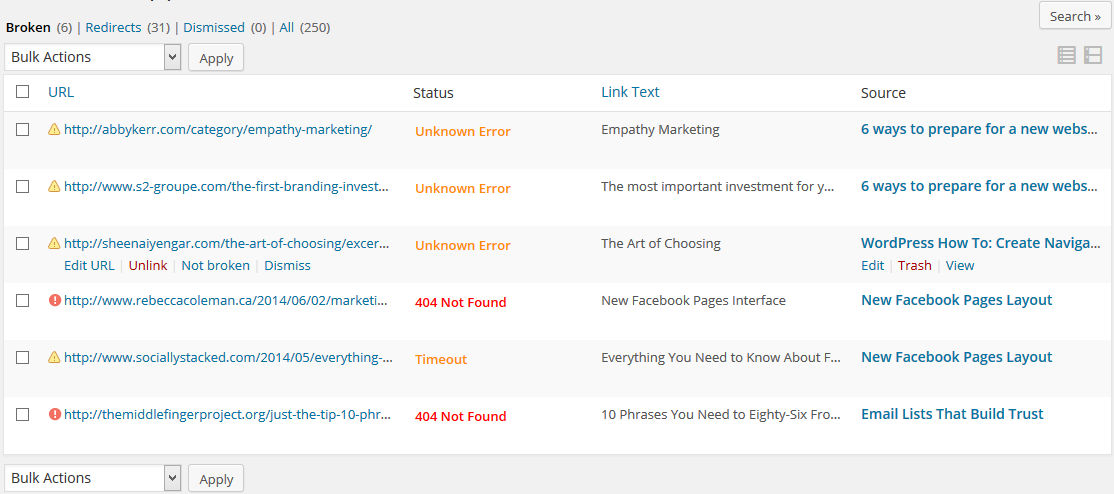
This will give you list of all the broken little buggers:
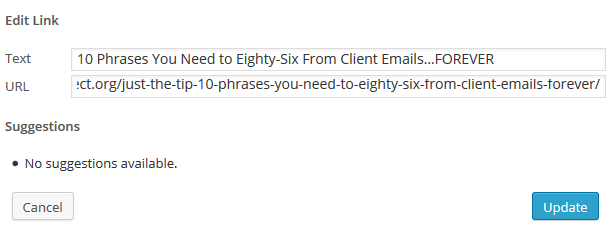
Click on a broken link to edit it. I like to copy the link and open it in another browser. A lot of times the error is just a type-o or the website took a while to load. In the case of the latter you may want to adjust your timeout period in the advanced options. In the case of the former find the correct link, fix the type-o, and click update!
Fun, right?!?
I hope you found this wink helpful! As always, I’m here with professional packages and can provide à la carte services if you ever want additional support.
Great tools to check broken website links:
- Broken link checker: Outlined in this article. Don’t use it if your website is large or your server is slow.
- W3C link checker: for intermediate users.
- Google Webmaster Tools: Check for crawl errors. For intermediate to advanced users.


