
Pictures are a crucial element to creating blog posts that are engaging for your target market. Getting perfect blog images is not the most simple task. But it can be done. The magic formula is to find a balance between the best quality and smallest size image.
Follow these steps to create perfect pictures for your blog posts — every time.
1. Image Formats
First you’ll need to get a firm understanding of web image basics. There are three different formats of images that you can use on your website: JPG, GIF, and PNG. For the purposes of this tutorial, I’ll focus on rastor images and we’ll save vector images for a different, more advance, tutorial!
JPG (or jpeg) is the best file format to use when your image is a photograph and includes a lot of different colours. It uses higher compression so you’ll get a smaller file size which is awesome, because it loads faster on a web page. It’s important to note that the more you compress a JPG image, the crappier it’ll look.
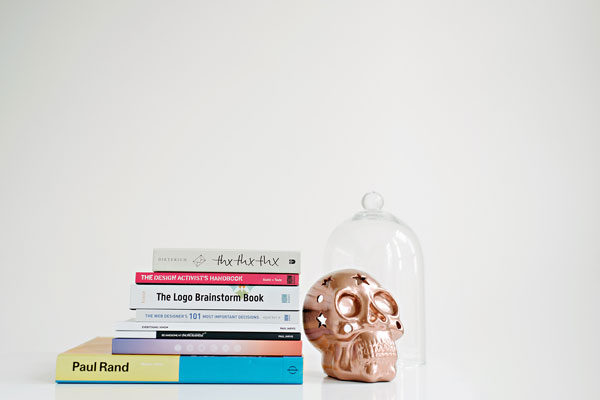
As an example, take a look at this image. The original file was 5.7MB and it’s now only 21 kb.
PNG is the best file format if you want a high quality image with lots of colours and a transparent background. Which can be awesome. IMPORTANT: this will result in a much higher file size but you’ll have a super high-quality image and be able to save a transparent background. Try sticking to PNGs for illustrations, graphics, drawings, and images that need a transparent background.
As a contrast, take a look at the same image below saved as a PNG it’s 161kb. That’s still a lot smaller than the original but far too big for a blog image.

GIF is the smallest, most bestest file for internet viewing, with a cost. You can get a maximum of 256 colours with a GIF. So photographs? NOT a good choice to save as a GIF. Because of it’s terrifically small file size and excruciatingly small colour range, GIFs are best for illustrations, graphics, logos, and generally any image that has a limited number of colours and requires a transparent background.
Here’s a good example of an image (icon) that has been saved as a GIF:
![]()
OH, and GIFs? Also support animation which is a groovy bonus!
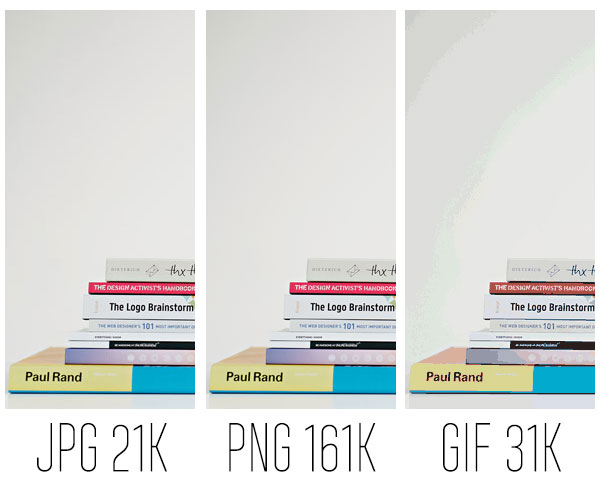
Below is an example of the same image, side-by-side, that’s been saved as a PJG, PNG, and GIF so that you can see the difference:
2. Edit that pic
Editing your photos is a really important step before you upload and publish them to your website. Please, please, PLEASE don’t just upload a raw photo from your digital camera (iPhone or otherwise) directly to WordPress. That digital camera was created to take high enough quality photographs that you’ll want to print. So for your blog? It’s way too big. That image’ll slow your site down and no one will wait long enough on your site till the thing loads (don’t even get me started on Canadian data charges).
If you can swing the $19/month for an Adobe Photoshop subscription, I’d highly recommend it. Photoshop has a built-in “Save for web” option that makes optimising your images for blog posts so.fricken.easy.
There are other image editing programs out there like GIMP, InfranView, Picassa, Canva… you get the idea.
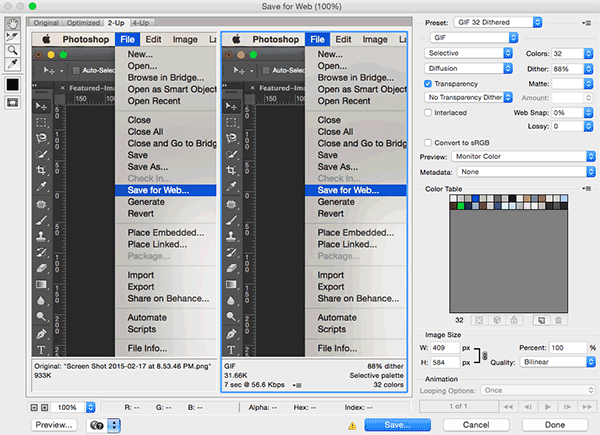
Here’s a screenshot of the “Save for web” tool in Photoshop:
Whatever image editing program you choose, you’ll want to use it to optimise your photos to be viewed on the web. Make sure they are 144 DPI and try to keep them around 50kb.
BONUS: make sure you strip any unnecessary meta data (camera specs, GPS data, IPTC address, etc). This meta data makes your file size larger. In photoshop, navigate to File > File Info and remove any unnecessary information.
3. Save it right
When you are finished editing + optimising your image, make sure you “Save for web” and change the file name to a name to be interwebs friendly. This means removing spaces from file names. Pretty please.
Best practice?
Use lowercase letters, numbers, and hyphens instead of spaces, k?
4. Uploading to WordPress
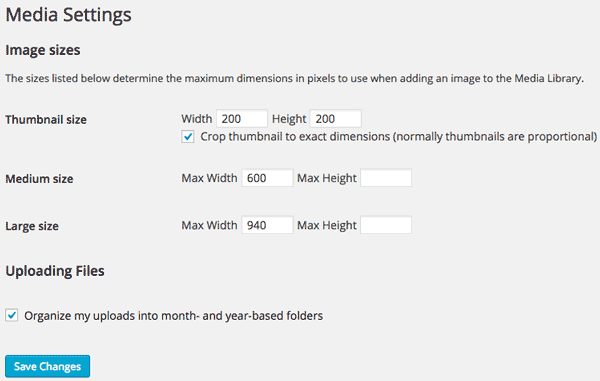
When you upload and insert a file to a post or page, WordPress automatically creates three different versions of that image: thumbnail, medium, and large sizes. You can edit the sizes in Settings > Media so that the resized versions suite your theme and needs better!
For example, let’s say your theme content area is 940 pixels wide. Well, the largest width you’ll want any image will be 940 pixels.
But, let’s say you also have a sidebar on your blog. If you take a look at the content area of blog posts then, you’ll see that it’s 600 pixels wide. So you’ll never need an image on your blog that is wider than 600 pixels!
And, for example, if you have a content area on your home page that includes features images from your latest blog posts that are 200 pixels wide, well, you guessed it, you’ll never need a thumbnail wider than 200px!
Armed with this information, you can navigate to your media settings and change them as follows:
Large: 940px
Medium: 600px
Thumbnail: 200px
Remember to click save when you are done.
OK, that’s it. What’s your favourite thing about adding images to blog posts? Let me know in the comments below!
Other sweet resources on how to create the perfect blog images for your posts:
- Oh, Google. You’re full of great information.
- Plugin Fun! Smush.it is a wicked WordPress plugin that reduces your image file size without losing quality.
- RIOT: a free image optimizing plugin for programs like GIMP that will let you to visually adjust compression parameters while keeping minimum filesize.
- Jetpack’s Photon is an image acceleration and editing service that reduces load on your server so your images are served faster.