
How to add media: WordPress basic tip
Here the situation: you have written an awesome post, edited it, polished it, and you are so super happy with your work! Now you want to add a PDF, a video, and/or an image to support that awesome content.
Where do you start?
Well, if you aren’t already editing your post or page, get it there! From your dashboard, either navigate to (Posts -> All Posts) or (Pages -> All Pages). Next, select the title of the page or post you wish to edit, or hover over it and click “Edit”.
Done? Great!
Now place the cursor in the position that you want to insert the image. (For the sake of this illustration, let’s say you want to add an image.) It is important to note that your image will be inserted in the position that your cursor is. So place it like you mean it 😉
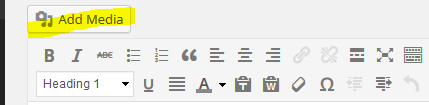
Next click the “Add Media” button above the WordPress Page/Post Kitchen Sink:
Next either choose the image that you want to add to this page, or upload a new one. To upload a new image, click “Upload Files.” Next, find the image that you want to insert into your page from your computer’s file browser (explorer, finder, and the like) and drag & drop the image into the multi-file uploader.

If this doesn’t work, click the “Select Files” button to use the browser upload method. It’s just as good, but not as amusing as the drag & drop method (in my humble opinion).
Attachment Details
Once your file has uploaded, you get to have a little fun with it in the “Attachment Details” panel. This next step is important for search engine optimization. The “Title” attribute declares the title for the image and should be short & concise. The “Alt text” attribute declares additional (or ALTERNATIVE) information about the image. It’s kinda like an additional tag for images. Setting the title and alt text attributes for each image will help search engines better understand the content on that page, because they really can’t read images. But they can read text. So provide happy search engine bots with text to read that describes the images on your page!

From the attachment details pane you can also edit or delete the image, add a caption (literally what it sounds like), and a description (which will only show up on the attachment page – more on this later) before you insert the image to your page.
Below the attachment details, you will see the “Attachment Display Settings” pane. This is where you control how your image is displayed on the page.
Alignment
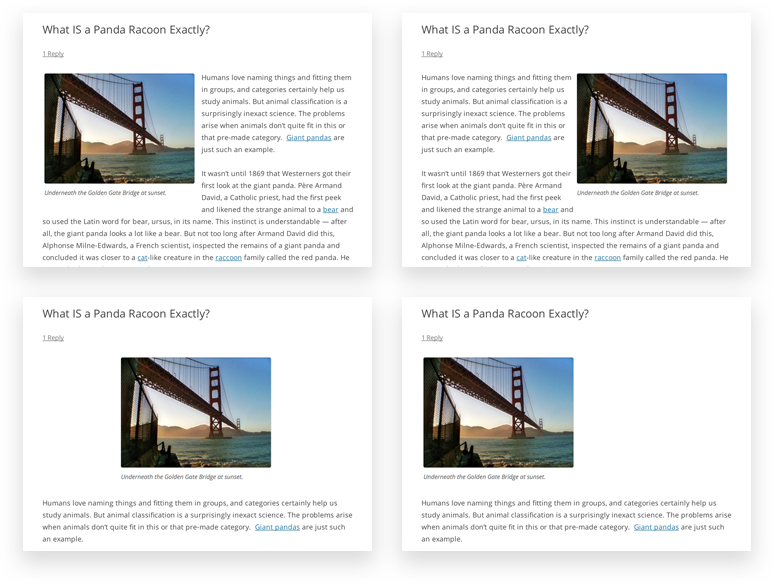
Alignment specifically means how the image will be displayed amongst your copy. Choose from None, Right, Left, or Center. If you choose “None,” your image will be displayed on a line by itself and any text will be above or below it. If you choose “Right,” your image will be displayed to the far right of your content area, and any text will wrap around the image on the left hand side. If you choose “Left,” your image will be displayed to the far left of your content area, with text wrapping around it on the right hand side. If you choose “Center,” your image will be displayed in the center of the content area on a line by itself and any text will be above or below it.
Link To
This is a great tool and I want you to think about it strategically. Think about the most important goal of your website. Is it to convert traffic? Is it to build relationships? Is it to be an epic resource? Is it to drive folks to and keep them at your website? Depending on what your goals are, you will want to use this tool in different ways. You can link an image to a larger version of itself (Media File), link it to a page that includes the image description (Attachment Page), link it to another page on your site or an external URL (Custom URL), or don’t link the image to anything at all (None).
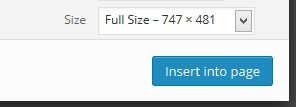
Size
It matters. WordPress automatically re sizes all of the images that you upload into thumbnail, medium, and large file sizes. Pick the most appropriate size for your post; think about aesthetics and legibility. Will it be large enough to see the details of your image yet small enough to fit in the content area? If you need to change the default settings for image size, you can do so by navigating from your Dashboard to (Settings -> Media):

Please note that the changes you make to default image sizes in WordPress will be implemented on any new images uploaded. If you want to re-size any previous images that you have uploaded, I recommend using the Regenerate Thumbnails plugin (stay tuned – next week I’ll show you how to install that plugin).
Finish what you start
So you have chosen an image, uploaded it, given it a title, alt tags, aligned it neatly to your page, linked it (or not), and chose the perfect size that will compliment your text. Now what? Let’s insert & publish, baby!
Click on the “Insert into page” button.
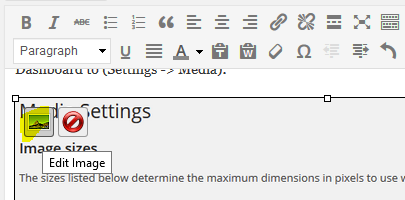
Viola! You should now be looking at your “Edit Page” (or post) screen with your fancy new image inserted exactly where you wanted it and looking fabulous! If it’s not as fabulous as you wanted it to look, hover over the image and click the little image icon (the alt text will read “edit image”). There you can change the alignment, size, text, and link of the image until you get it just right.
Once you are finished all that editing, make sure you click “Update” to save all your changes!!
Some more helpful tips on how to add media in WordPress:
- From the WordPress Codex: All about the WordPress Add Media screen
- From the WordPress Codex: Inserting Images into Posts and Pages
- Google: Using ALT tags smartly
- WordPress plugin directory: Regenerate Thumbnails
So what do you think? Is there anything that is still keeping you guessing about adding media to posts and pages in WordPress? I’d love to hear from you in the comments below.
Do you know someone who could benefit from this article or my professional packages? Send them my way! They’ll be glad you did.